eCommerce photography is the practice of capturing high-quality images of your products to showcase them on online platforms. Taking good product photos involves proper lighting, setup, and post-editing to highlight details and features clearly. Relying on a professional photographer ensures consistent, high-quality results.
What is eCommerce Photography?
eCommerce photography refers to the practice of capturing high-quality images of products for use on online stores or eCommerce websites. These photos showcase products in a clear, professional way to help potential customers understand features, appearance, and value. Good eCommerce photography can increase trust and conversions.
Why is eCommerce Product Photography Important?
High-quality product photography for eCommerce plays a critical role in the success of your online store by influencing how customers perceive and interact with your brand.
- Increases Conversions – Surveys show that 83% of consumers find product images highly influential in their online purchasing decisions, and 60% expect to see three or four images when shopping.
- Reduce Your eCommerce Return Rate – Including accurate, high-quality product images is a recommended strategy by marketing researchers to reduce eCommerce return rates.
- Attracts Traffic From Search Engines – Optimized images can boost your visibility on Google Images, which represents over 20% of all U.S. search activity according to Jumpshot. You can also get organic traffic from other Google properties, such as Google Shopping.
- Builds Trust – Clear and professional images make your products look authentic and reliable. Poor visuals can make items appear low quality or even fraudulent, discouraging buyers.
- Photos Are a Versatile Asset – Well-shot product photos can be reused across your website, social media, online ads, and third-party marketplaces like Amazon or eBay..
- Engagement – Providing multiple product angles or lifestyle shots increases customer engagement and helps build a stronger emotional connection with your products.
Types of Product Photography for eCommerce
There are several photography styles you can use to showcase products effectively across online platforms.
Traditional Photography
This approach involves using physical equipment, lighting setups, and sometimes human models to create professional product visuals.
White Background Style
This classic style places the product on a pure white background to remove distractions and keep the focus on the item. It is ideal for eCommerce listings and marketplaces.
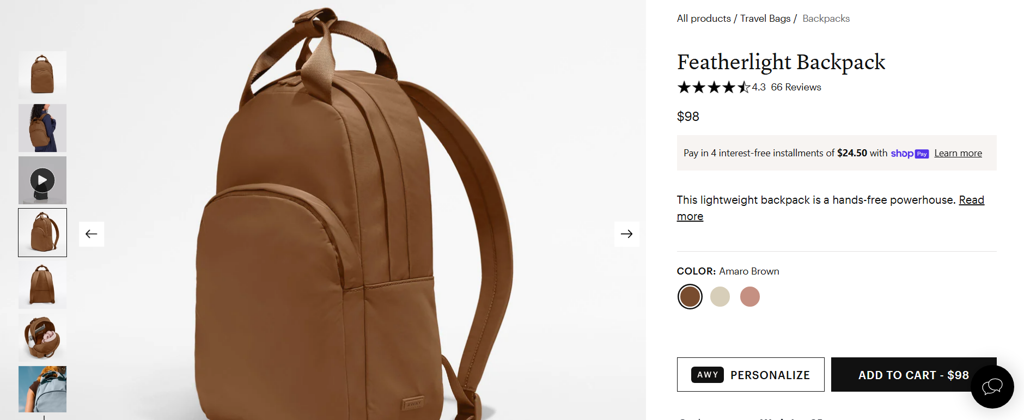
Source: awaytravel.com
Minimalistic Style
Minimalist product photography uses clean compositions with limited colors and elements. It emphasizes the product’s design without overwhelming the viewer.
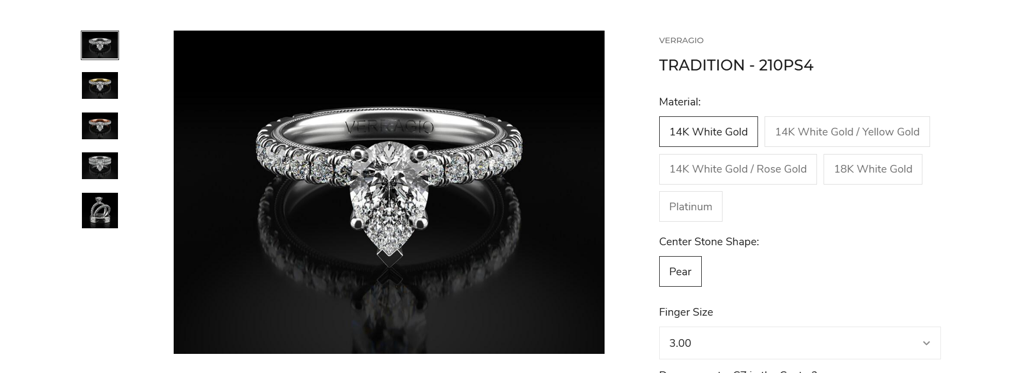
Source: birminghamjewelry.com
With Props
Props add creativity and context to your images. Common props include backgrounds, models, animals, or everyday items used in visually interesting ways.
Source: vandrie.com
Product Packaging
This style highlights the product’s box or labeling. It builds trust by showing customers what to expect and helps identify genuine products.
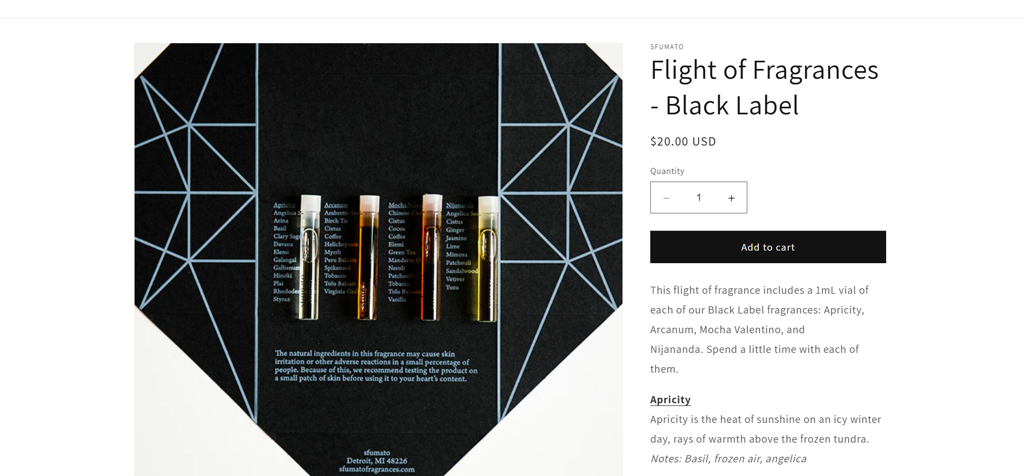
Source: sfumatofragrances.com
Zoom or Close-up
Close-ups show fine product details and textures. They are also useful for highlighting imperfections in used items or specific design features.
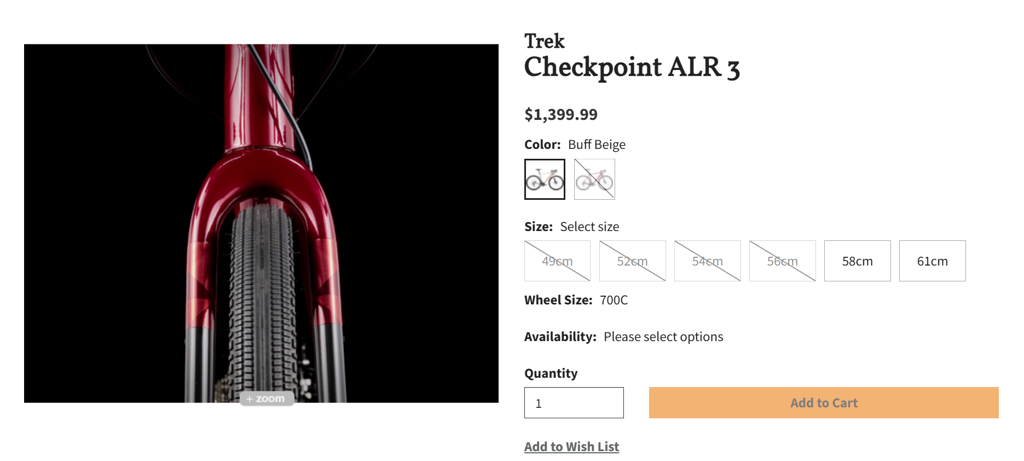
Source: raysbike.com
Group Shots
Group shots display multiple products or variations in one photo. They are effective for upselling sets or showing how items complement each other.
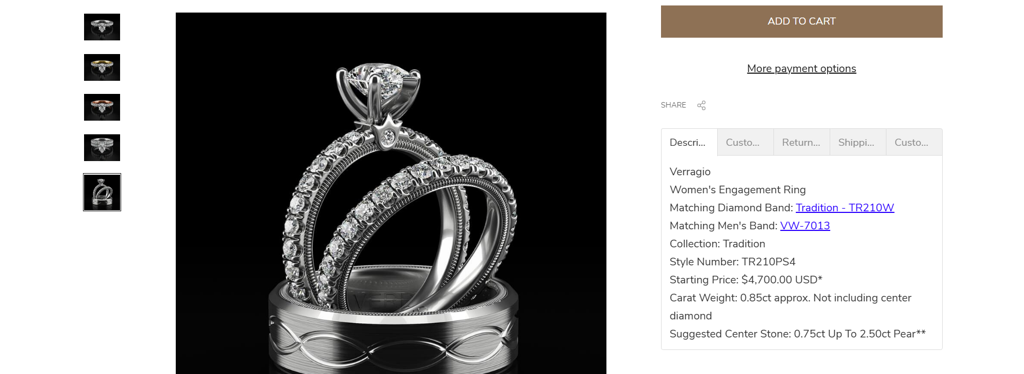
Source: birminghamjewelry.com
360-degree Photography
This interactive style allows users to see a product from every angle. It is ideal for high-end items where viewing details from all sides builds buying confidence.

Source: fogia.com
Scale Shots
By placing the product next to a familiar object, scale shots help customers understand its actual size, which can reduce uncertainty and returns.
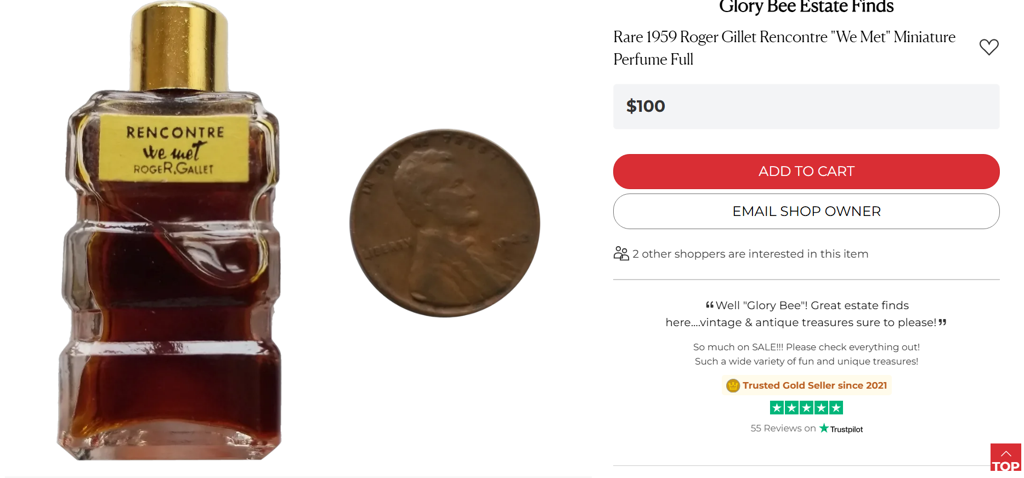
Source: rubylane.com
Process Shots
These behind-the-scenes photos showcase how products are made or packaged. They add authenticity and help customers connect with your brand’s story. These types of shots are usually used in About Us pages.

Source: tenthousandvillages.com
On Model Photography
Using a model to showcase your product creates a realistic, relatable image that helps shoppers picture themselves using it.
Hand Modeling
Hand modeling highlights your product in action, held or used by a person’s hand. It gives customers a better sense of size, function, and how the item might look when delivered.

Source: thearomalabs.com
Lifestyle
Lifestyle photography shows your product in a natural setting to reflect real-life use. It helps customers imagine the item as part of their daily routine, especially for clothing, home goods, and accessories.
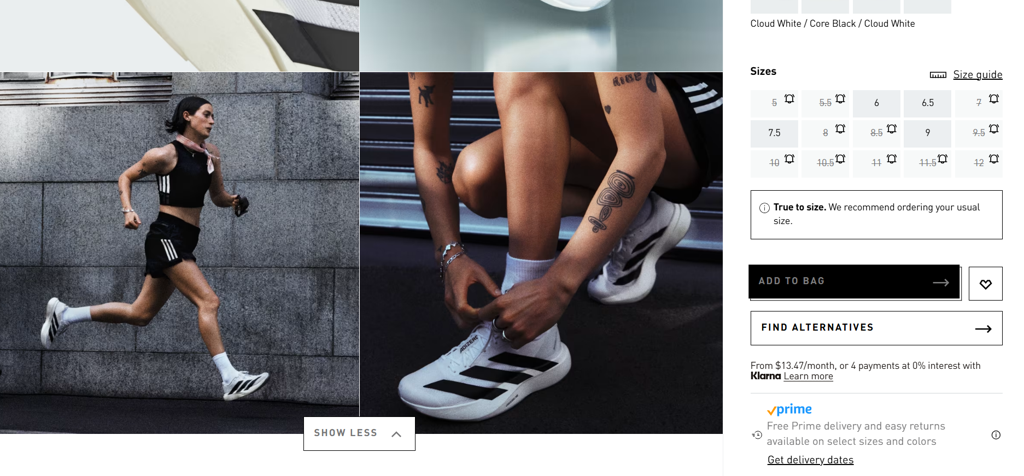
Source: adidas.com
CGI Photography
CGI (Computer Generated Imagery) uses software to create realistic images or animations, giving you flexibility and full control without the need for physical product shoots.
White Background
CGI makes it easier to photograph complex products by digitally placing them on a clean white background. This results in sharp, professional visuals without lighting challenges.
Minimalistic Style
CGI is ideal for minimalistic photography, allowing complete control over elements like light, shadow, and background. It keeps the focus on the product’s design and features.
With Props
With CGI, you can design or purchase 3D models to enhance your scene without relying on a physical studio setup.
3D Hand Modeling
When finding the perfect model is a challenge, CGI hand modeling offers a consistent and customizable solution that maintains realism.
Traditional Photography vs CGI
Both traditional photography and CGI offer unique advantages depending on your product type, budget, and creative needs.
- Camera vs Software: Photography captures real-world subjects with cameras while CGI uses 3D software to create virtual scenes and objects.
- Control: CGI allows full control over lighting, angles, and materials long after the shoot, which is often not feasible with physical sets.
- Flexibility: Once 3D assets exist, it’s easy to generate different variations without reshoots, saving time on updates.
- People: CGI struggles to realistically render people unless you have a very large budget. Photography is a better option when real people are needed.
- One of a Kind Items: If your products are handcrafted or unique, photography is more practical and cost-effective than building custom 3D models.
- High-Detail Products: Products with complex textures or small parts take much longer to model. Photography captures these details with less effort.
- Inventory Size: For stores with many unique products, traditional photography is faster and more efficient than modeling every item in CGI.
How to Take Product Photos on a Budget
If you’re starting out or working with a limited budget, you can still create quality product images with a few essential tools and techniques.
1. Gather Your Tools
- Smartphone with a good camera, ideally 12 megapixels or more
- A tripod sturdy enough to hold your phone
- A white poster board to serve as a clean backdrop
- A foam board to help improve lighting conditions
- A spot near a large window with natural light and enough space for your setup
2. Create Your Setup
- Position your table next to the window and close to a wall
- Tape the white poster board securely at the top and bottom to avoid visible edges
- Test the lighting. If too bright, move the table further away from the window or use a white bed sheet to soften the light
- Fold the foam board in half and place it opposite the window to reflect light onto the product
3. Adjust Your Settings
- Center your tripod
- Keep your phone close enough to the product to avoid exposed edges
- Turn off other lights in the room to rely on natural light
- Choose a sunny day for shooting
- Adjust camera settings. Recommended settings include: focus point, exposure, and white balance
- Disable the camera flash
- Avoid digital zoom – move the tripod closer instead
4. Take Your Photos
- Capture multiple angles of the product
- Photograph details like texture, stitching, and materials
- Include lifestyle shots showing the product in use
- Use a 10-second timer to prevent camera shake
5. Edit Your Photos
- Use editing apps like Snapseed, Lightroom, or Adobe Photoshop
- Adjust brightness, sharpness, contrast, saturation, and highlights carefully
- Keep edits minimal to maintain real colors and details. You want your photos to be as true to life as possible
To learn more, visit our blog post on How to Take Better Pictures with Your Phone.
Benefits of Hiring a Professional Product Photographer
Professional photographers deliver quality that meets your company’s unique needs. Working with a professional means gaining creative direction tailored to your brand. They know the specific shots needed for web content, ensuring photos support your business goals and look great in digital spaces.
They excel in post-production, using advanced editing to enhance colors, correct flaws, and optimize images for the web, and use high-end cameras, lenses, and lighting equipment for capturing images with superior detail and clarity.
Most importantly, hiring a professional frees you to focus on running your business. Photography can be extremely time-consuming, and leaving it to experts can save you a significant amount of time and effort.
Professional eCommerce Photography with Artonic
Artonic has been helping businesses grow since 2005 through expert digital marketing, effective web design, and impactful brand development. We offer professional photography in Michigan for local eCommerce and brick-and-mortar companies.
Our in-house photographer uses high-end equipment to capture high-quality images that elevate your brand. We’ve worked with clients like Grizzly Glue and Harcourt to strengthen their online presence through professional product photos and digital marketing services.
Contact us today or explore our free Ebook, 10 Stats about the Value of Photography, to learn more.
Frequently Asked Questions
Here are some quick answers to common questions about eCommerce photography.
How Much Does eCommerce Photography Cost?
Costs vary depending on whether you handle eCommerce product photography yourself or hire a professional. DIY requires investment in equipment and editing time. Professional services vary by location, photographer experience, and equipment quality.
How Do I Optimize My Images for eCommerce?
To optimize images, reduce their file size using tools like TinyJPG, and use descriptive alt texts and filenames when uploading them to your website for increased user experience and for more organic traffic through search engines like Google.
What Are the Benefits of High-Quality Product Photography for eCommerce?
High-quality images increase conversions, reduce return rates, and improve search visibility. They also build trust, support brand credibility, and can be reused across websites, ads, and social platforms.